Introduction
Creating and selling online courses or workbooks doesn’t have to be overwhelming—or expensive. Thanks to Canva, you can design professional, visually appealing learning materials without needing advanced design skills or costly software. Whether you’re an educator, coach, entrepreneur, or simply someone with valuable knowledge to share, Canva gives you the tools to turn your ideas into polished digital products.
In this guide, we’ll walk through everything you need to get started: from setting up your Canva account and planning your content to customizing templates, exporting your materials, and marketing them online. By the end, you’ll know exactly how to create high-quality courses and workbooks that your audience will love—and pay for.
Table of Contents
What You Will Need
Step 1: Set Up Your Canva Account and Workspace
Step 2: Plan Your Course or Workbook Content
Step 3: Choose the Right Canva Templates
Step 4: Customize Your Visuals and Layout
Step 5: Add Interactive and Structural Elements
Step 6: Export and Format Your Files for Delivery
Step 7: Set Up Your Sales Platform and Pricing
Step 8: Market Your Course and Workbook
Step 9: Deliver, Support, and Gather Feedback
What You Will Need
Getting started with creating and selling online courses or workbooks on Canva requires a mix of digital tools, some planning materials, and a clear idea of your audience. You’ll want to gather everything upfront so the creative part feels seamless, not a scramble. Taking stock of your resources first is the secret ingredient to avoid hiccups down the road.
- Canva Account: A Canva account is your creative playground, available for free with lots of features, though the Pro version unlocks smoother access to premium templates and additional resources. Signing up is quick, letting you dive into designing courses or workbooks with a vast library of graphics, fonts, and layout options. Think of it as your design kitchen, stocked and ready for your visual recipes.
- Content Outline or Script: Before visually assembling anything, you need a roadmap—a detailed outline or script that breaks down every lesson, section, or page you plan to include. This acts like your GPS, preventing you from veering off topic or forgetting key points while designing. The clearer and more comprehensive your notes, the easier it is to craft engaging and organized materials.
- Branding Assets: Your logo, color scheme, preferred fonts, and style guidelines are essential in creating a consistent, professional feel throughout your digital products. Scattering random colors or fonts can make your course look less cohesive, so having these on hand keeps your work instantly recognizable. These assets help maintain your unique voice and ensure users feel connected to your brand.
- High-Quality Images and Icons: Visuals are the lifeblood of Canva creations, so sourcing clean, relevant images, illustrations, or icons beforehand boosts your design flow. While Canva offers a solid library, having custom or branded imagery can elevate your course or workbook beyond the generic. Pick visuals that enhance understanding or add personality without overwhelming your content.
- Writing and Editing Tools: While Canva is superb for visuals, polishing your words usually happens elsewhere—Google Docs, Word, or dedicated editing apps help tighten your copy. Drafting and revising text outside Canva means fewer distractions and less risk of losing your work. Once your content is polished, paste it into your designs for a smooth finish.
- File Storage and Backup: Cloud storage platforms like Google Drive or Dropbox keep your files secure and accessible from anywhere, meaning no sweaty panic about lost work. Organize your assets, drafts, and final exports here, so you stay super efficient and disaster-proof. Regular backups also let you iterate confidently, knowing what you’ve done is safe.
- Sales and Delivery Platform: To sell your courses or workbooks, you’ll need a reliable platform like Teachable, Gumroad, or Shopify that integrates with your payment system and delivers content automatically. Picking the right platform depends on your audience size, technical comfort, and the type of digital product you’re offering. This setup lets you focus on creating while it handles the business side smoothly.
Having all these essentials lined up means you’re not just jumping blindly into design but steering your project with purpose. It sets the stage for creativity to flow without constant stops and starts, making sure your final creation shines.
Step 1: Set Up Your Canva Account and Workspace

You can’t design without your canvas, so the first step is familiarizing yourself with Canva’s environment. Whether you’re a total newbie or occasionally dabbled with graphics, setting up your workspace well is like clearing your desk before starting a big art project. This preparation lets you mosey through all the tools and shortcuts without feeling lost.
- Create and Upgrade Your Account
Start by registering for a Canva account if you haven’t yet. The free version is pretty robust, but upgrading to Pro unlocks features like transparent backgrounds, brand kits, and a treasure trove of premium templates that save hours. Consider your project scale and budget to decide if a Pro subscription will pay off for you.
- Familiarize Yourself With the Interface
Spend some casual time clicking through the dashboard, menus, and design panels. Notice how drag-and-drop works, where you find text tools, and the treasure chest of templates or elements. This playground isn’t scary once you poke around, so treat it like a friendly puzzle you’re about to solve.
- Create Brand Kit and Template Folders
If you’re going to build courses or workbooks regularly, setting up your Brand Kit within Canva is a game-changer. Upload logos, pick your brand colors and fonts, then save reusable templates and folders for each project. It’s like laying down tracks ahead of a train rollout—it keeps your creative pace steady and consistent.
Creating a comfy, organized Canva workspace right away trims the learning curve drastically. Once this foundation is solid, you have all the right tools at your fingertips to let your creativity take center stage.
Pro Tips for a Smooth Setup
- Use Canva Tutorials
Canva’s own tutorial videos are helpful and bite-sized, perfect for snacking on while you design. They cover hidden gems of the interface you might otherwise miss. Watching a few saves frustrating clicks later.
- Set Keyboard Shortcuts
Learn a handful of shortcuts like duplicating elements or grouping layers—it speeds up your workflow effortlessly. It’s like knowing the secret handshake that gets you VIP access. Faster design means more time perfecting your course.
- Keep Templates Handy
Start with a couple of go-to templates you tweak for each project. This saves you from reinventing the wheel every time you launch a course or workbook. Consistency also helps build your brand identity seamlessly.
Optional Workspace Enhancements
- Integrate Canva Apps and Plugins
Explore Canva’s ecosystem to add apps for video, charts, or music that might fit your course style. These extras spice up your content without needing other software. It’s like adding sprinkles to an already tasty cupcake.
- Use Canva’s Collaboration Feature
Invite teammates or editors to your Canva workspace to work together in real-time. This keeps feedback loops instant and projects moving without endless email threads. Perfect for group courses or business owners.
- Set Up Design Grids and Frames
Creating design grids within Canva helps maintain alignment and balance in your layouts. Frames also make image placement cleaner and consistent. This subtle structure can elevate even a simple workbook look.
Step 2: Plan Your Course or Workbook Content
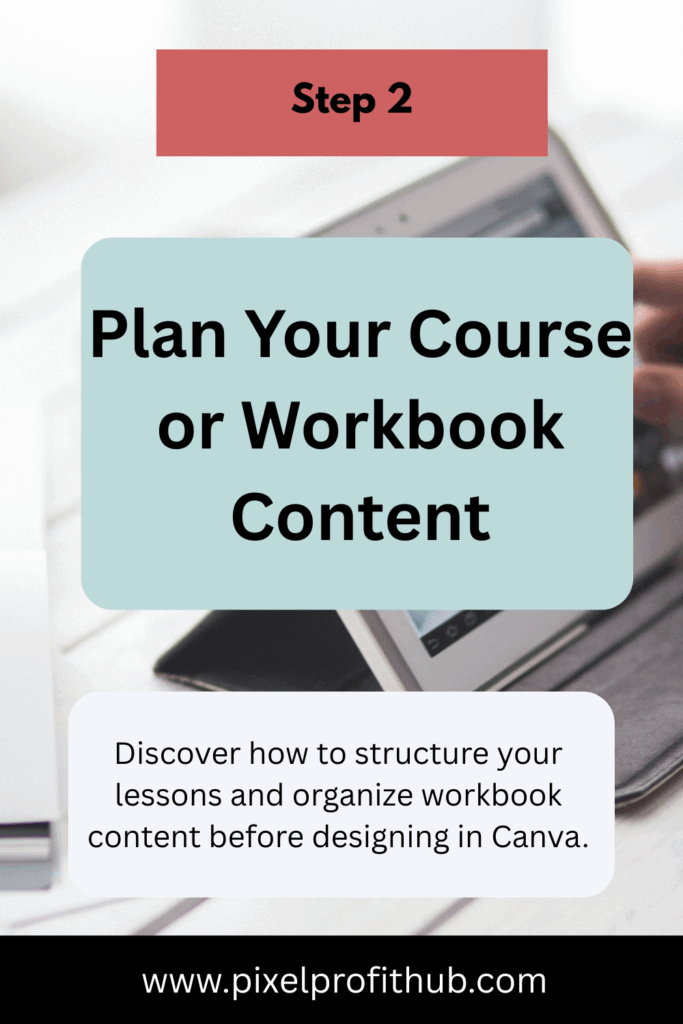
Before you get lost in fonts and colors, the heart of your project—the content—needs clear shape and substance. Planning your lessons, exercises, and flow is the blueprint that supports every design choice. Rushing into Canva without a solid game plan often leads to headaches later, so put on your thinking cap and get cozy with your course goals and workbook structure.
- Define Your Learning Objectives
What do you want your students or readers to walk away knowing, doing, or feeling? Clear objectives act like North Stars to direct your content and design elements. Without them, you risk a scattershot course that overwhelms or disappoints.
- Outline Modules or Sections
Break your content into manageable chunks—think of these as chapters or episodes in a binge-worthy series. Each module or workbook section should have a focused theme or skill to keep users engaged and progressing. Outlining this way also helps pacing and prevents information overload.
- Plan Interactive Elements and Exercises
Engagement isn’t just about pretty pictures; it’s about interaction, reflection, and application. Plan where quizzes, fill-in boxes, prompts, or activities will go. These elements transform passive consuming into active learning, boosting retention and satisfaction.
Going deep into content planning saves hours in reworking and redesign. It clarifies your path so the visuals and text support rather than compete, making your course or workbook a joy to create and a breeze to follow.
Pro Tips for Structuring Content Effectively
- Start With a Mind Map
Sketch out ideas visually first with mind maps. This connects topics and subtopics in an organic way, sparking new insights. It’s less formal than outlines and can highlight gaps or overlaps early.
- Use Customer Feedback
If you’ve taught before or know your audience, pull in their questions or struggles to shape content. This real-world input makes your course genuinely useful. People love when their pain points are solved.
- Set Time Estimates per Lesson
Estimate how long each section takes to complete to help users manage their time. This transparency enhances trust and keeps expectations realistic. Stick to these guides during design.
Creative Planning Approaches
- Add Storytelling Elements
Incorporate anecdotes, case studies, or scenarios relevant to your topic. Stories help users relate and remember concepts better. They also make dry content feel fresh and lively.
- Include Resource Lists
Plan spaces where students can find recommended books, websites, or additional tools. This extends learning beyond your course and builds your credibility as a guide. Resource lists are appreciated by curious minds.
- Create Personal Reflection Prompts
Offering questions for learners to journal or think about can deepen understanding. Reflection turns information into insight. It adds a personal growth dimension to your materials.
Step 3: Choose the Right Canva Templates
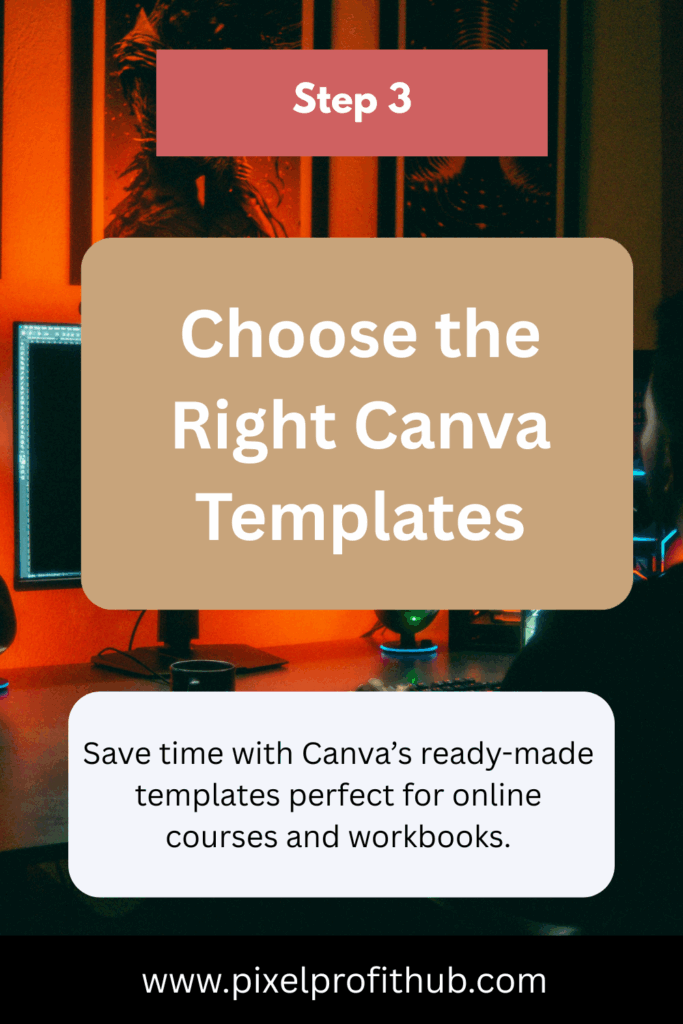
Templates are your trusty sidekick in Canva, turning blank screens into inspired beginnings. Choosing the perfect template for your course or workbook can sprinkle hours off your design time while still allowing your unique flair to shine. It’s about finding that sweet spot between guided structure and creative freedom.
- Search for Course or Workbook Specific Templates
Canva houses a vast template library tailored for digital learning products. Use keywords like “course,” “workbook,” or “lesson plan” to filter options. These templates often come pre-loaded with text boxes, headers, and layouts suited for educational content, saving you setup stress.
- Match Templates to Your Brand Style
Templates come in all vibes—modern, minimalist, playful, or corporate. Pick ones that naturally align with your branding assets and audience expectations. Your workbook for entrepreneurs should speak differently than a course for kids, after all.
- Ensure Template Flexibility
Look for templates that are easy to customize—drag elements freely, change colors, and resize without breaking the design. Avoid rigid templates that feel like a straitjacket, limiting your ability to adapt content length or add unique touches. Flexibility makes the creative process enjoyable rather than frustrating.
Templates are like the starting lineup on game day; you want the best fit for your unique play style. Picking well here sets the tone and structure for your entire project, making every step afterward feel intuitive and intentional.
Pro Tips for Template Selection
- Preview Multiple Templates
Don’t settle on the first template you see; explore a few and envision your content inside each. Sometimes, an unexpected option feels more right once you try it. Keep options open before committing.
- Use Grid and List Layouts
For workbooks, templates with grids or lists simplify organizing exercises and checkpoints. Grids bring neatness that makes completion satisfying. Lists help chronologically lead learners through tasks step by step.
- Check Mobile Responsiveness
Although Canva is primarily desktop-based, remember many users access courses on phones or tablets. Choose templates that look good scaled down or can be easily adjusted post-design. Accessibility is key to happy customers.
Alternative Template Strategies
- Customize Templates with Your Icons
Inject personality by swapping out default icons for your own or ones from specialized icon packs. This subtly boosts professionalism and brand recognition. Custom icons also support visual storytelling.
- Mix Template Elements
Don’t feel locked into one template per project—pull favorite components from various templates and blend them. This mashup approach creates unique layouts tailored to your content’s flow. Canva’s drag-and-drop makes this surprisingly easy.
- Create Variation Templates
Design a few template versions for different modules or sections to maintain user interest. This prevents monotony when learners flip through multiple pages. Variety can refresh attention without losing cohesion.
Step 4: Customize Your Visuals and Layout
Now that your bones—aka templates and outlines—are in place, it’s time to flesh out the design with your personality and content. Customizing your layouts and visuals crafts an inviting learning environment that can make all the difference between “meh” and “wow.” It’s like seasoning a dish: a little tweak here or there can elevate the whole experience.
- Apply Brand Colors and Fonts Consistently
Stick to your pre-chosen palette and typography throughout all pages to maintain a polished, cohesive look. The magic of consistent brand elements is that they create subconscious trust and familiarity for your audience. It also makes your materials look like they were made by pros, not just thrown together.
- Design Clear Hierarchies for Headings and Text
Use font sizes, weights, and spacing strategically to differentiate titles, subtitles, and body text. This mirrors the natural flow of reading and helps learners mentally organize information better. Good hierarchy reduces overwhelm and invites users to scan and focus easily.
- Incorporate Engaging Visuals and Icons
Drop in relevant images, icons, and illustrations to break up text and visually convey ideas. Avoid the trap of overloading with decorative but distracting graphics—each should serve a clear purpose. Well-chosen visuals aid comprehension and keep the pages inviting.
This step is your chance to flex creative muscles while prioritizing clarity and user comfort. The attention you pay here transforms your digital pages from bland information dumps into sleek learning tools that invite participation.
Pro Tips for Design Consistency
- Use White Space Generously
Don’t cram content; breathing room around elements enhances readability and reduces user fatigue. Like a good conversation, comfortable pauses make everything more enjoyable. White space guides focus naturally.
- Align Elements Precisely
Use Canva’s alignment and snapping tools to keep everything perfectly lined up. Misaligned text boxes or images can subconsciously signal carelessness. Crisp edges and balanced layouts are calming and professional.
- Limit Font Variations
Stick to two or three fonts max per project for neatness and brand consistency. Too many fonts create visual chaos and distract learners. Choose complementary fonts that pair well for headings, body text, and accents.
Advanced Customization Ideas
- Add Background Patterns or Textures
Subtle patterns behind your content can enrich the sensory experience without stealing the spotlight. Think light gridlines, soft brush strokes, or muted shapes. This adds dimension and interest without clutter.
- Use Color Blocks for Emphasis
Highlight essential info or calls to action with color-blocked backgrounds or banners. This technique draws eyes and breaks monotony. It’s especially handy in workbooks to keep users on track.
- Include Illustrative Storytelling
Try adding thematic graphic elements or custom illustrations seeded throughout content that tell a story or reinforce your message. This creates emotional engagement and memorability. Storytelling design is a secret learning hack.
Step 5: Add Interactive and Structural Elements
Interactivity is the secret sauce for turning passive scrolling into active learning, especially for courses and workbooks. Canva’s features don’t just let you arrange visuals—they enable adding layers of engagement so users connect deeper with your material. Think of this as weaving in the elastic threads that make your creation flexible and user-friendly.
- Embed Fillable Text Boxes and Checklists
Provide spaces where users can type their answers or mark completion right inside your workbook PDFs. These elements transform static documents into working tools. They boost learner interaction and cater to different learning styles.
- Link External Resources or Videos
Insert clickable links that open supplementary videos, articles, or downloads to expand learning beyond your pages. Hyperlinks make your course feel like a multimedia experience rather than a flat read. Keep these links relevant and easy to spot.
- Use Page Numbers and Navigation Buttons
Numbering pages and/or adding clickable “Next” or “Back” buttons helps learners stay oriented and move smoothly through your content. This mirrors physical books or e-learning platforms, reducing frustration and abandonment. Good navigation feels like a guided tour, not a maze.
Infusing thoughtful interactive features takes your project from passive content to an active, memorable learning journey. It also shows users you care about their experience beyond just delivering info.
Pro Tips for Better Engagement
- Add Interactive Quizzes via Links
Use platforms like Google Forms or Typeform and embed links to fun quizzes that complement your lessons. This adds variety and instant feedback. It’s like a mini-exam without the stress.
- Incorporate Downloadable Worksheets
Offer separate printable sheets or templates users can download for extended practice beyond your main workbook. These extras add value and encourage deeper engagement. Bonus content also nudges up customer satisfaction.
- Use Embedded Audio or Voice Notes
If suitable, add audio explanations or voice notes via links to personalize teaching. Hearing your tone can clarify nuances and boost connection. Audio is especially helpful for language or coaching courses.
Step 6: Export and Format Your Files for Delivery

Wrapping up your Canva compositions means thinking carefully about how you’ll package and send them out. Exporting isn’t just hitting “download”—it’s a strategic step to make sure your course and workbook files look great, work well, and play nicely with different devices or platforms. This phase saves your users from wrestling confusing file types or low-res frustrations.
- Choose the Right File Format
For workbooks, exporting as PDF standard or PDF print keeps layout and interactivity intact on most devices. For course slides or presentations, also consider MP4 video or PowerPoint export depending on format and delivery. Selecting the right format means your materials arrive crisp, accessible, and ready to use.
- Optimize File Size Without Losing Quality
Balancing resolution and file weight matters for smooth downloads and opening speeds, especially for users with slower internet. Canva allows compression settings, so tweak these to compact files while preserving necessary visual clarity. Avoid huge, unwieldy files that frustrate customers.
- Add Metadata and Descriptions
File names and metadata (like titles and keywords in the document properties) help keep your files organized for both you and your buyers. Thoughtful naming conventions also simplify version control if you update courses later. Metadata can lightly boost your professional presentation.
Handling export well makes your products feel technically polished and customer-ready instead of half-finished. It’s the final handshake your work gives before it reaches the learner’s hands.
Pro Tips for Professional Formatting
- Export Test on Multiple Devices
Download your files and open them on a phone, tablet, and different computers to ensure consistent appearance. Variability can be jarring. Early testing helps you troubleshoot before sales.
- Use Descriptive File Names
Instead of generic “Course1.pdf,” try “MasteringSocialMedia_Workbook_v1.pdf.” Clear names avoid confusion and create trust. Customers appreciate knowing what they’ve got.
- Keep Editable Versions Separate
Maintain Canva or source files aside from client-facing exports for easy future updates or customizations. This helps if a client requests revisions or if you want to repurpose. Organized archives keep you ready to roll.
Alternative File Delivery Options
- Create Bundles of Formats
Offer clients both PDF and editable versions (like PowerPoint or Canva share links) to suit different user preferences. This flexibility can add perceived value. Choice empowers customers.
- Include a Branded Cover Page
Add a visually appealing cover with your logo and course title on the exported file’s first page. This professional touch boosts credibility. It also helps learners keep track of your materials in crowded downloads.
- Embed Hyperlinks in the Table of Contents
Make navigating your PDF super easy by hyperlinking the table of contents entries to their corresponding pages. It’s a tidy shortcut for users and resembles slick eBooks. Helps especially lengthy workbooks feel nimble.
Step 7: Set Up Your Sales Platform and Pricing

Designing and exporting is half the battle; now you’ve got to actually get your course or workbook into the hands of your eager audience. Setting up a sales platform involves more than just uploading files—it’s about crafting an accessible and secure shopping experience that builds trust and encourages conversions. Pricing strategy is also a crucial part of this puzzle.
- Choose a Selling Platform That Fits Your Needs
Platforms like Teachable, Gumroad, or Shopify each have their unique strengths depending on your product type, marketing needs, and technical comfort. Some offer full course hosting while others focus on file delivery. Researching this first prevents headaches and keeps checkout smooth.
- Set Clear and Competitive Pricing
Consider your target market, course or workbook length, content depth, and competitor pricing when deciding your price point. Don’t undervalue your expertise but stay realistic about what your audience can afford. Pricing can make or break sales, so test different tiers or bundles if unsure.
- Create Effective Product Descriptions and Sales Pages
Your sales page should clearly outline benefits, provide previews, and address customer questions like a friendly salesperson. Use conversational and persuasive language that mirrors your course’s tone. Good descriptions reduce customer hesitation and refunds.
The business side of course selling can feel like uncharted waters, but nailing your platform and pricing setup makes your venture professional and scalable. It also frees you to focus on what you love: creating and connecting.
Pro Tips for Pricing & Platform Choice
- Use Platform Analytics
Leverage built-in dashboards to track visits, sales, and buyer behavior. These insights help fine-tune pricing, content, and marketing. Data-driven decisions pay off.
- Offer Payment Plans or Discounts
Make your courses accessible by providing flexible payment options or early bird coupons. This increases affordability and rewards loyal customers. It can boost conversions significantly.
- Keep Terms and Refund Policies Clear
Publish straightforward policies upfront to avoid misunderstandings and foster trust. Clear terms build buyer confidence and reduce disputes. Transparency reflects professionalism.
Optional Sales Strategies
- Create Limited-Time Launch Offers
Drive urgency with discounts or bonuses tied to launch windows. This encourages quick decisions and builds buzz. Scarcity is a classic marketing tool that works.
- Bundle Courses and Workbooks
Package your digital products together for added value and higher sales volume. Bundles entice bigger purchases and deepen user learning. Think of it as a combo meal of education.
- Use Testimonials and Reviews
Showcase early student feedback or case studies on your sales page to create social proof. Real experiences help hesitant buyers feel comfortable. Ask for reviews proactively.
Step 8: Market Your Course and Workbook
You’ve made something great—now the trick is letting the world know it exists. Marketing is less about shouting and more like a casual, genuine conversation with people who need exactly what you offer. A thoughtful approach here gets your courses and workbooks in front of the right eyes without feeling salesy.
- Leverage Social Media to Spark Interest
Use platforms your audience frequents to share sneak peeks, behind-the-scenes clips, or testimonials. Storytelling hack: frame posts as helpful tips, not just product ads. This builds organic engagement and attracts warm leads.
- Build an Email List and Send Nurturing Campaigns
Regular newsletters and launch announcements cultivate a loyal tribe eager to buy from you. Include free content or mini-lessons that demonstrate your value. Emails feel personal—like a chat over coffee—which is exactly what you want.
- Collaborate with Influencers or Partners
Find folks or brands with audiences that align with yours and team up for giveaways, guest posts, or joint webinars. Shared credibility expands your reach quickly. Collaboration often beats cold solo shouting.
Spreading the word requires patience, consistency, and authenticity. The better you connect with your audience’s real needs, the more natural sales conversations become instead of forced pitches.
Pro Tips for Effective Marketing
- Use Hashtags Strategically
Research and use hashtags that your target customers follow, balancing popular and niche terms. This extends your visibility without spamming. It’s like being in the right crowd at the right time.
- Post User-Generated Content
Encourage early students to share testimonials or course outcomes on social media and repost them with permission. This social proof buzz feels a lot like word-of-mouth, which is powerful. It also builds community.
- Track Your Campaign Performance
Use tools like Google Analytics or platform insights to check what works and pivot accordingly. Understanding which posts or emails drive sales saves time and money. Marketing without feedback is guesswork.
Optional Promotion Channels
- Host Live Stream Q&A Sessions
Engage your audience directly by answering questions live on Instagram, Facebook, or YouTube. This builds trust and clears barriers to purchase. Live feels immediate and human.
- Create Free Mini-Courses or Challenges
Offer bite-sized versions of your content as giveaways to hook potential buyers. This sample taste acts like a friendly handshake before the full offering. It lowers risk for first-timers.
- Invest in Paid Ads
If budget allows, run targeted ads on social media or search engines to widen reach quickly. Focus on well-crafted, benefit-driven copy rather than flashy gimmicks. Ads can jump-start visibility in crowded markets.
Step 9: Deliver, Support, and Gather Feedback
Once your course or workbook is sold, the journey continues. Delivery and ongoing support are critical to leaving buyers happy and coming back for more. A smooth, responsive post-sale experience turns first-time customers into raving fans and can inform your future creations.
- Automate File and Access Delivery
Use your sales platform’s automation to instantly deliver download links or course access upon purchase. This eliminates manual work and ensures customers get what they need immediately. Prompt delivery feeds good vibes and minimizes buyer anxiety.
- Provide Customer Support Channels
Set up clear ways for users to reach you with questions or issues—email, chat, or even a dedicated FAQ. Responsive support improves user satisfaction and builds trust. People value feeling heard and helped.
- Solicit Feedback and Testimonials
Encourage learners to share their experiences through surveys, reviews, or casual check-ins. This insight informs course improvements and marketing—and makes customers feel involved. Feedback rounds out the learning loop.
Strong delivery and supportive follow-through transform your digital product from a transaction into a relationship. Those happy learners become your best promoters and repeat buyers.
Pro Tips for Ongoing Success
- Set Expectations Early
Be clear on how and when customers will receive content, what support looks like, and any timelines. Managing expectations ahead reduces confusion. Clear communication is kindness.
- Create a Welcome Guide
Send a brief guide or video introducing your course or workbook, how to navigate materials, and best ways to engage. This friendly onboarding eases new users into the experience. It’s like a concierge for your product.
- Use Feedback to Iterate
Periodically update your course based on user comments and evolving trends. Showing you listen builds brand loyalty. Iteration keeps your content fresh and relevant.
Optional Support & Feedback Strategies
- Create a Private Community Group
Offer a Facebook group or Slack channel where learners connect, share wins, and ask questions. This builds camaraderie and adds value beyond content. Communities turn courses into experiences.
- Host Live Check-Ins or Webinars
Schedule occasional live touchpoints with your students to maintain momentum and answer burning questions. Live contact boosts completion rates and satisfaction. It’s personal and motivating.
- Offer Certificates or Badges
Reward learners for completing courses or levels with downloadable certificates or digital badges. This celebrates achievements and encourages sharing. Recognition helps seal the deal for future sales.
Conclusion
Selling online courses and workbooks is one of the most effective ways to share your expertise, build authority in your niche, and generate passive income. With Canva, the process becomes simple, affordable, and scalable. You don’t need to be a graphic designer or tech wizard—just follow the steps, apply the pro tips, and use the optional strategies that fit your style.
Now it’s your turn. Start designing, test your first workbook or mini-course, and put it out into the world. Remember, progress matters more than perfection. Each product you launch not only helps your audience but also moves you closer to building a sustainable digital business.